Ad Clicks : Ad Views : Ad Clicks : Ad Views : Ad Clicks : Ad Views : Ad Clicks : Ad Views :
Oh Snap!

It looks like you're using an adblocker. Adblockers make us sad. We use ads to keep our content happy and free. If you like what we are doing please consider supporting us by whitelisting our website. You can report badly-behaved ads by clicking/tapping the nearby 'Advertisement' X text.

Modeling a Motorcycle in Blender

/

Release date:2016, July 15

Duration:04 h 01 m

Author:Darrin Lile

Skill level:Beginner

Language:English

Exercise files:Yes

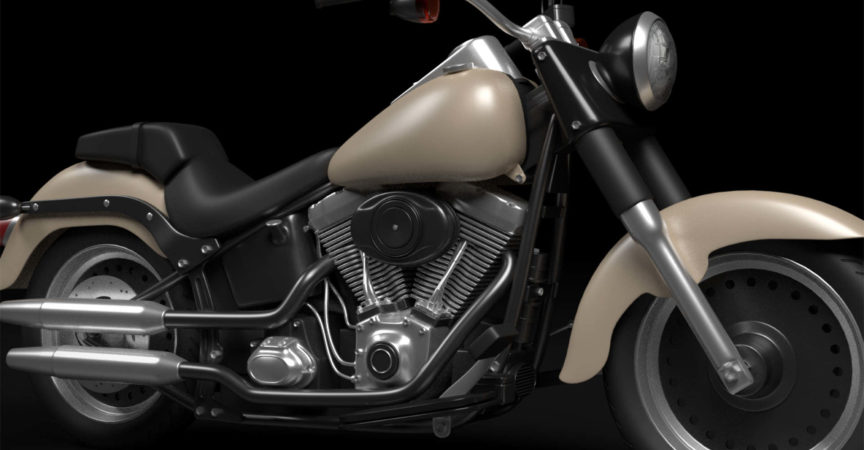
Learn production techniques for hard-surface modeling a realistic motorcycle in Blender. Author Darrin Lile guides you through the process of creating a Harley-Davidson Fat Boy with proper scale and proportions. These techniques can be used to replicate any other vehicle or man-made machined parts in Blender.

Darrin begins by creating the frame of the motorcycle using curves. He then builds up the motorcycle piece by piece, creating the exhaust pipes, fenders, handlebars, engine components, and brakes. These lessons capitalize on the Path tool and modifiers like Solidify and Booleans. Finally, Darrin uses Blender’s Cycles render engine to create the materials and lighting for the scene, and UV maps the textures to key pieces of the bike. In the end, you will have a greater understanding of Blender’s modeling tools and production processes so that you can create vehicles and other hard-surface projects of your own.
Topics include:
Creating the frame
Converting a path to polygons
Modeling the gas tank, tires, fenders, exhaust, and other parts
Building the engine
Modeling the seats, wheels, and lights
Lighting the scene
Adding materials and texturing
Rendering the motorcycle

Table of Contents

Introduction
Welcome 48s
What you should know 38s
Using the exercise files 20s
1. Creating the Frame
Importing a background image 3m 47s
Creating a path for the frame 5m 23s
Converting a path to polygons 7m 46s
Finishing the frame 7m 3s
2. Modeling the Accessories
Modeling the gas tank 7m 4s
Modeling the tires 4m 47s
Creating the fenders 8m 1s
Building the fork tubes 10m 39s
Modeling the exhaust pipes 4m 34s
Adding the handlebars 8m 11s
Detailing the handlebars 9m 36s
Modeling the mirrors and turn signals 5m 40s
3. Building the Engine
Building the engine 10m 20s
Creating the heads 12m 14s
Adding rocker covers 13m 10s
Modeling the air filter 8m
Modeling the gear box 7m 47s
Creating the oil tank 6m 6s
Finishing the exhaust pipes and adding tubes 11m 45s
Modeling the transmission cover 8m 16s
4. Modeling the Seats, Wheels, and Lights
Adding the seats 8m 9s
Creating the speedometer 5m 50s
Modeling the rear brackets 8m 29s
Creating the wheels 7m 37s
Adding the lights 9m 11s
Creating the foot rest and switch 6m 22s
Finishing the modeling 4m 8s
5. Lights, Materials, and Rendering
Setting up the lighting 5m 5s
Adding materials to the bike 8m 45s
UV mapping select pieces 5m 4s
Adding textures 7m 50s
Creating the final render 2m 27s
Conclusion
Goodbye 54s

  • Facebook
  • Twitter
  • Google+
  • Linkedin
  • Pinterest

Leave a Comment

Your email address will not be published. Required fields are marked *