Introduction To Packaging Visualization in Blender
Release date:2021
Author:Harshavardhan Saravanan
Skill level:Beginner
Language:English
Exercise files:Yes
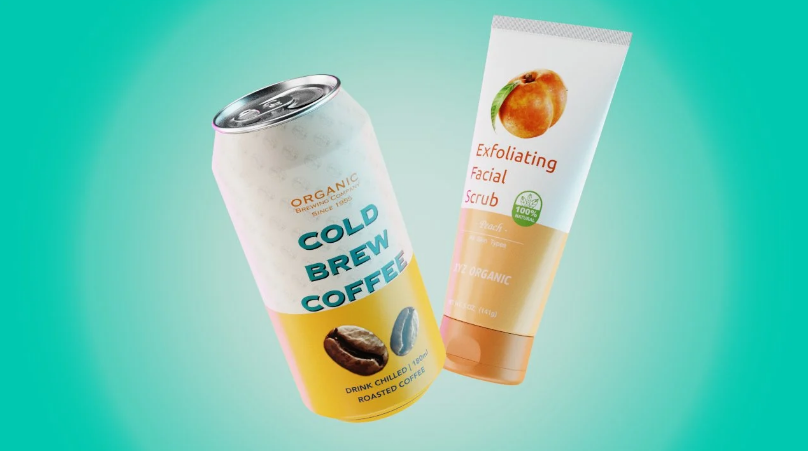
This Course introduces you to blender, a great open source 3D content creation software that is predominantly used in industries like movies, animation and games. In this course, we explore the possibility to use Blender as a tool for packaging design.
Choosing 3D model over mockups
3D models are extremely customisable and versatile
Allows simulation of surface details like embossing, UV, foiling, transparency and paper texture.
Ability to view the design from multiple angles.
Better accuracy of texture mapping on curved surfaces.
Offers more flexibility and control.
Unlocks animation capabilities.
What is 3D Visualization for packaging all about?
The end goal of a packaging visualisation is to show your 2D packaging design concepts on a 3D model as if it was made for real. By doing 3D visualisations, we gain a deeper understanding of our design, hence one can quickly prototype ideas using 3D software and make confident and quick design decisions which will reduce the production time. A 3D visualisation can greatly benefit a designer as one can communicate ideas with 3D renders to potential people such as clients or investors and get feedback.
To sum up, 3D visualisation helps to
Reduce production time
Better understanding of a design
Make better design decisions
Communicate design ideas to potential people
Make Animations
What does a 3D software offer for Packaging Designers?
A 3D content creation offers creative tools for various industries for a vast amount of different needs. This makes a 3D software seem daunting and complicated to learn. But the tools needed for a packaging designer is much simpler and easy to learn. We will make use of certain tools in the following domains : Modelling, UV unwrapping, Texturing and Shading then finally Rendering.
Why Blender as a tool for Packaging Designers?
It has got powerful tools required for packaging design.
Cross platform nature runs the same on windows, Mac OS and Linux.
Clever development makes it extremely light weight software that can run even in lower computer configurations.
Continuous development adds new features.
Growing and great community support with new tutorials added everyday.
Blender is open source and free software (please consider donating) and is free to use for learning as well as commercial purposes.



 Channel




can’t thank you enough for your contribution,
as a guy who cant afford any courses this helps us and give the people in community a new beginning life
thank you admins
why its deleting comment