Complete Sight-Size Drawing Course
Release date:2020
Author:Leo Mancini-Hresko
Skill level:Beginner
Language:English
Exercise files:Not Provided
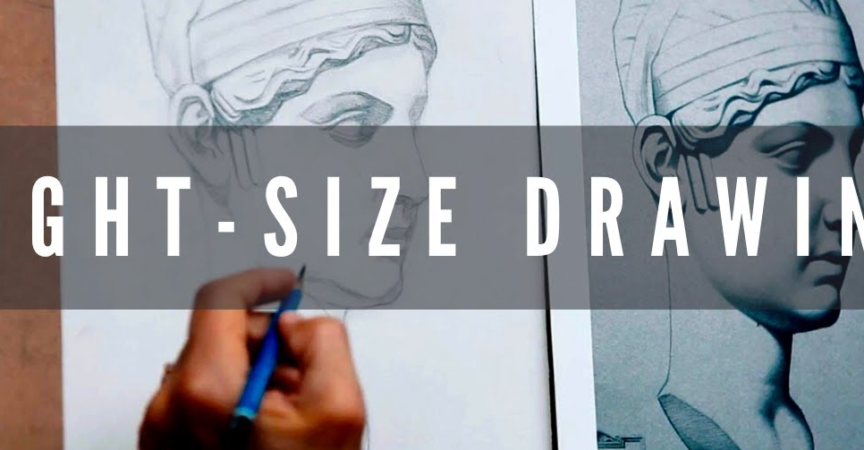
Academies and ateliers around the world are increasingly teaching an American realist approach to drawing and painting known as sight-size. Taught today by the students of American artists R. H. Ives Gammell and Richard Lack, this popular approach has been exported throughout the world and is now taught in dozens of schools. In sight-size, the easel and the subject matter are positioned in such a way that the artist makes one-to-one horizontal comparisons for a high level of optical accuracy. Hosted by Florence Academy of Art founder Daniel Graves, this massive course is the most comprehensive breakdown of the sight-size approach ever produced online. Senior sight-size instructors, Leo Mancini-Hresko and Joe Altwer will teach you the materials, set-up, exercises, and process which are taught in top ateliers from the comfort and convenience of home. You can use course either as an alternative to attending an atelier or academic art school or as a preparation or even supplement to one. You will utilize the historical Charles Bargue plates, plaster casts and live models to develop your drawings from simple light-and-shade straight line patterns, to full beautifully rendered tonal works. By the end of this course, you’ll be an expert in the approach and be ready to take on Sight Size Painting Course, scheduled for a 2020 release.
1. Sight-Size Drawing Lesson 1: Introduction to Sight-Size Method With Leo Mancini-Hresko
In this lesson, Leo Mancini-Hresko will introduce the Sight-Size approach to drawing. He will go over the tools and the materials you will be using, such as pencils and charcoals (And their hardness), as well as different types of drawing paper.
2. Sight-Size Drawing Lesson 2: Beginner Bargue Plate Project With Leo Mancini-Hresko
In this lesson, Leo helps you get into the basics of academic drawing study; specifically, the Charles Bargue course. You’ll practice copying a beginner Barge plate, along with using the Sight-Size drawing tools – a mirror and a plumb line.
3. Sight-Size Drawing Lesson 3: Intermediate Bargue Plate Project With Leo Mancini-Hresko
This lesson is the next step of Charles Bargue course. Using the Sight-Size Method, Leo will demonstrate drawing the intermediate Bargue plate.
4. Sight-Size Drawing Lesson 4: Short Poses Figure Project With Joe Altwer
In this lesson, Joe Altwer will be drawing 4 different 2-hour poses using the Sight-Size methodology. You will learn how to block in a figure with straight lines, define a contour and a shadow line, develop shadow shapes, and apply values for shadows.
5. Sight-Size Drawing Lesson 5: Plaster Cast Project With Leo Mancini-Hresko
This lesson is the 7-hour demo of drawing a plaster cast with charcoal. You will learn how to block in the drawing with the help of a mirror and a plumb line, how to define shadow and light shapes and turn them into forms. Leo will also go over 9-step value theory and “keying the drawing” process.
6. Sight-Size Drawing Lesson 6: Portrait on Toned Paper Project With Leo Mancini-Hresko
In this lesson, Leo will draw a portrait of a live model with the same light and shade pattern as in the Plaster Cast Project. This will be the same technique that he used for drawing 3d still objects with the only difference that his model is going to be slightly moving.
7. Sight-Size Drawing Lesson 7: Long Pose Figure Project With Leo Mancini-Hresko
In this lesson, Leo will demonstrate how to draw a long pose figure project with charcoal on white paper with the same degree of contrast as in Plaster Cast Project. Drawing along with the instructor you will gain the skills of using full tonal range in your work.
8. Sight-Size Drawing Lesson 8: Short Pose Figure on Toned Paper Project With Leo Mancini-Hresko
In this lesson, Leo will work through the same problems but in a short pose drawing. He will be working on toned paper from a live model trying to get a real sense of who this person is and how he is standing.
9. Sight-Size Drawing Lesson 9: Final Long Pose Figure Project With Joe Altwer
In this lesson, you will learn to draw a full-valued figure. Along with the instructor, you will go all the way from lighting set-up and choosing a model’s pose to defining and organizing shadow and halftone values.
Lesson 01 – Introduction to Sight-Size Method
01. Sight-Size Method Course Trailer
02. Interview with Daniel Graves, Founder and Director of the Florence Academy of Art
03. Introduction to Sight-Size Drawing
04. Tools and Utensils Overview (Part 1)
05. Tools and Utensils Overview (Part 2)
06. Drawing Papers
Lesson 02 – Beginner Bargue Plate Project
01. Beginner Bargue Plate Project Overview
02. Charles Bargue Course Introduction
03. Copying of a Simple Bargue Plate
04. Refining the Drawing
05. Comparing the Drawing and the Bargue Plate with the Mirror, Getting the Drawing More Precise
06. Finishing Up the Drawing
07. Beginner Bargue Plate Project Assignment Instructions
Lesson 03 – Intermediate Bargue Plate Project
01. Intermediate Bargue Plate Project Overview, Blocking In the Drawing
02. Blocking in Shadow and Light Shapes
03. Checking the Widths and the Angles with the Plumb Line
04. Positive and Negative Shapes, Soft and Hard Edges
05. Criticizing Your Own Work, Working with Eraser and Making Adjustments
06. Darkening the Drawing
07. Detailing the Drawing
08. Finishing the Drawing
09. Intermediate Bargue Plate Assignment Instructions
Lesson 04 – Short Poses Figure Project
01. Short Poses Figure Project Overview
02. Defining the Contour of the Figure
03. Refining the Shadow Shapes and the Figure Outline
04. Sitting Pose- Blocking the Figure with Straight Lines, Developing Body Gesture, and a Shadow Line
05. Sitting Pose- Refining the Shadow Line and the Outline
06. Standing Contrapposto Pose- Blocking the Figure with Straight Lines, Defining Gesture, Proportions, and a Shadow Line
07. Standing Contrapposto Pose- Working on Shadow Shapes
08. Standing Pose- Working on a Line Quality
09. Standing Pose- Closing the Shadow Shapes and Applying Values for the Shadows
Lesson 05 – Plaster Cast Project
01. Plaster Cast Project Introduction
02. Making the Project Plan, Starting Blocking In the Drawing
03. Blocking In the Shapes, Adding More Information
04. Checking Angles and Proportions with the Mirror and the Plumb Line, Putting In Some Tone to Separate Light and Dark
05. Putting More Tone Into the Drawing, Double-checking the Proportions
06. Working on the Shadow Shapes, Filling in the Background
07. Nine-step Value Theory, Working on the Light-and-shade Pattern
08. Characterization of the Shapes, Getting Them More Precise
09. Darkening the Background, Getting the Drawing More Contrasty
10. Keeping the Shadow and the Light Shapes Flat, Staying Away From Modeling
11. Defining Halftones, Starting Modeling the Forms
12. Bringing Down the Values
13. Adjusting the Values (Part 1)
14. Adjusting the Values (Part 2)
15. Adjusting the Values (Part 3)
16. Values Compression and Keying Edges
17. Finishing the Drawing
18. Plaster Cast Project Assignment Instructions
Lesson 06 – Portrait on Toned Paper Project
01. Portrait on Toned Paper Project Overview
02. Blocking In the Portrait
03. Defining Facial Features, Putting In Some Tone
04. Detailing the Features, Working on Shade and Light Shapes
05. Defining Highlights with a White Chalk, Working on the Facial Expression
06. Adding More Information to the Drawing
07. Working with a Brush and an Eraser
08. Working with a White Chalk
09. Final Pass Over the Features
10. Unifying the Values, Adding Accents
11. Finishing the Drawing
12. Instructor Summary
Lesson 07 – Long Pose Figure Project
01. Long Pose Figure Project Overview
02. Blocking In the Figure
03. Developing the Contour and Introducing the Shadow Shapes
04. Comparing the Drawing and the Model, Making Adjustments
05. Laying out the Tone, Working on the Head and the Facial Features
06. Working on the Visual Impression
07. Starting Modeling, Getting a Sense of Form
08. Working on the Shadow Edges, Modeling the Form
09. Building Hierarchy of the Halftones
10. Darkening the Shadows and the Background
11. Unifying the Edges, Starting Detailing
12. Detailing the Drawing, Working on the Background
13. Detailing the Drawing, Working on the Standing Leg
14. Checking the Design and Tonal Structure of the Drawing with the Black Mirror
15. Keeping Working on the Tonal Relationships and Hierarchy
16. Comparing the Tone of the Legs, the Mid Section and the Chest
17. Adding Accents to the Drawing
18. Accentuating Some Darker Tones
19. Final Pass Over the Drawing
20. Long Pose Figure Project Assignment Instructions
Lesson 08 – Short Pose Figure on Toned Paper Project
01. Short Pose Figure on Toned Paper Project Overview
02. Blocking In the Figure
03. Defining the Outline and Placing the Big Shadow Shapes
04. Adding Values to the Big Light and Shadow Shapes
05. Placing Smaller Shapes
06. Adding Values to the Smaller Shapes
07. Comparing the Drawing with the Model, Making Changes
08. Modeling the Forms
09. Adding More Information to the Drawing
10. Final Pass Over the Figure, Adding Accents
11. Finishing the Drawing
12. Short Pose Figure on Toned Paper Project
Lesson 09 – Final Long Pose Figure Project
01. Long Pose Project Overview, Lighting Set-Up, Choosing a Pose, Blocking In the Figure
02. Developing the Contour and Introducing the Shadow Shapes
03. Wrapping up the Shadow Shape, Connecting Everything Together
04. Working on the Outline and Adding Values to the Shadows
05. Working on Shadow Values and Putting in a Background Value
06. Correcting the Outline
07. Reconfirming Positions of the Shapes
08. Improving the Outline, the Shadow Shapes, and the Light Shape, Introducing Mid-Tone Values
09. Adjusting the Background Value and Putting in Larger Values inside the Light Shape
10. Introducing Halftones and Darkening the Shadows and the Background
11. Working on the Middle Area of the Figure and Getting Through the Whole Body
12. Getting the Background to its True Value and Adjusting its Relationships with Halftone Values
13. Working on the Lower Legs and Going Up the Body
14. Working on the Halftones and Bringing the Background to a Unified Value
15. Continuing Working on the Values, Flipping Over the Drawing
16. Bringing the Contrast Up, Refining the Shapes and the Values Throughout the Whole Drawing
17. Organizing and Refining the Values
18. Unifying the Values
19. Modeling a Form and Refining the Whole Drawing
20. Clarifying Shapes in the Knee and Lower Leg Area and Working on the Portrait
21. Comparing the Values on the Face and on the Body, Working on the Standing Leg
22. Correcting the Shadow Line on the Standing Leg, Resolving the Shapes
23. Refining the Outline of the Figure and Resolving the Shapes
24. Cleaning and Finishing Up the Drawing
Hi there, what software do you use for video conversion ? ( size reduction )
Thanks in advance
ffmpeg
Hi !
Could you please add this Sheldon Borenstein’s course called Drawing Fundamentals Pt 1-5. I heard it was a good once to start leaning the foundations as a total beginner.
Thanks in advance !
check out this site
Can you add Sheldon Borenstein’s Drawing Fundamentals Course on NMA please?
ok
Hey, how can I buy the premium voucher? Is there an easy way to do it? I try to check it out but none seems to accept Paypal