


POTHEAD – Create a Hard Surface Character in Blender

Release date:2021, October
Skill level:Beginner
Language:English
Exercise files:Yes
Course URL:https://cgcookie.com/courses/pothead-create-a-hard-surface-character-in-blender
POTHEAD: Create a Hard Surface Character in Blender
With an adorable old robot as your guide, learn how to create a Blender character, step-by-step in this deep-dive course. Workflows include hard surface, subdiv modeling, hand painted texturing and procedural textures.
Step-by-step course on bringing a concept art character to 3d with Blender
Who doesn’t love an underdog ? Rusty and bruised, this little guy proves there is fire in him yet.
Pothead was first created in 2016 the great Tim von Rueden (@vonnart) as one of the original CG Cookie characters.
Today, our Blender trainer Jonathan Lampel breathes fresh life into Pothead and makes him shine… all in Blender.
Pothead is your guide for creating characters in Blender, step by step
In 40 lessons you’ll go from the default Blender scene… to a complete character that’s ready for a rusty adventure.
“Pothead makes for a great learning project because he is made up of mostly simple shapes – but with a few complex pieces thrown in.”
~ Jonathan Lampel
Chapter 1: Hard Surface and Subdivision Surface Modeling
Because Pothead is made up of several hard surface pieces, we’ll get the opportunity to talk about booleans, bevels, and creases in chapter 1.
But, because he’s also round and smooth, you’ll learn how to incorporate those techniques into a subdivision surface modeling workflow.
Chapter 2: UV Unwrapping and Texturing Preparation
The second chapter focuses on UV unwrapping and preparing Pothead for texturing.
It’s no small task, but with the right techniques the process becomes very straightforward.
Hand painted textures are perfect for matching the concept’s rusty metal appearance into a 3d shader, so we will paint our own in Blender, but we’ll also enlist the help of some procedural textures for the smaller, sharper, and more random details.
At the end, we’ll bake everything to one texture set – so Pothead can render quickly in Eevee and be exported to any other application
In 40 lessons and more than 17 hours of runtime, this is a fantastic project that covers a lot of ground…and skills that you will benefit from in countless future projects of your own.
Got questions? Let us know!
As always, we’ll be here to help you along.
Ask a question below – this will notify Jonathan and he’ll jump in to help out.
Chapter 1 Modeling Pothead
pothead_01_blockout
pothead_02_blockout
pothead_03_pot
pothead_04_handle
pothead_05_head
pothead_06_body
pothead_07_feet
pothead_08_leg-r
pothead_09_leg-l
pothead_10_leg-l_02
pothead_11_arms
pothead_12_controller
pothead_13_hands_01
pothead_14_hands_02
pothead_15_connecting-the-arms
pothead_16_connecting-the-legs
pothead_17_detailing_the_cables_and_wires
pothead_18_connecting_the_cables
pothead_19_face_01
pothead_20_face_02
pothead_21_modeling-cleanup
Chapter 2 UV Unwrapping Pothead
pothead_22_unwrapping_pot
pothead_23_unwrapping-head
pothead_24_unwrapping-body
pothead_25_unwrapping_arms
pothead_26_unwrapping_leg_L
pothead_27_unwrapping_leg_R
pothead_28_unwrapping_controller
pothead_29_materials-and-packing
Chapter 3 Shading and Texturing Pothead
pothead_30_painting-workspace
pothead_31_painting-the-pot
pothead_32_painting-the-face
pothead_33_painting-the-body
pothead_34_painting-the-misc_parts
pothead_35_painting-the-cables
pothead_36_metal_shader
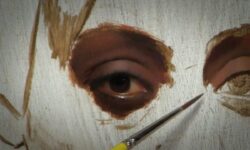
pothead_37_eyes
pothead_38_paint-details
pothead_39_bump-details
pothead_40_touch-up-and-baking
[CGCookie] POTHEAD – Create a Hard Surface Character in Blender.7z
[CGCookie] POTHEAD – Create a Hard Surface Character in Blender_Subtitles.7z


Thank you for uploading this course on my request.
Merry Xmas!
Thanks, please upload this course – CGCookie – SESSIONS: Minimalism
https://cgcookie.com/courses/sessions-minimalism
i think the video files are corrupted?? whenever i try to download a video only half of the video is downloaded and theres an error for the undownloaded part
I tried downloading the files for this lesson – everything downloads and opens fine for me. Please check your internet speed, try restarting, or switch to a different provider. From our side, everything is working perfectly.