Ad Clicks : Ad Views : Ad Clicks : Ad Views : Ad Clicks : Ad Views : Ad Clicks : Ad Views :
Oh Snap!

It looks like you're using an adblocker. Adblockers make us sad. We use ads to keep our content happy and free. If you like what we are doing please consider supporting us by whitelisting our website. You can report badly-behaved ads by clicking/tapping the nearby 'Advertisement' X text.

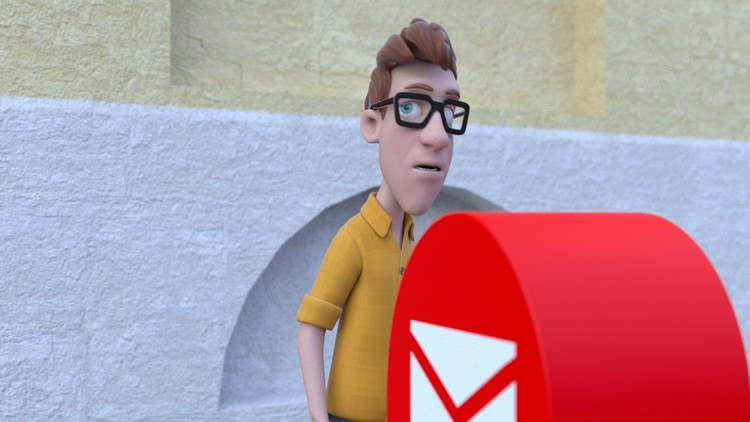
Making an Animated Short Film with Blender

/

Release date:2016, June

Duration:15 h 48 m

Author: Marko Matosevic

Skill level:Beginner

Language:English

Exercise files:Yes

What Will I Learn?
Go through the process of creating an animated short film
How to source character models
How to source and create audio sound track

Requirements
Basic understanding of Blender, Video and audio editing software

Description
In this course, we will go through the process of creating an Animated short film.

We will start of with how I find inspiration in every day activities, and how to evolve a story so that it will be interesting. From here we will record the reference footage which will be our story board. We will then go into ways of finding locations to tell the story. Next we will focus on sourcing 3D characters and assets from different applications and sources to find the one that suits you. Next we will focus on modeling and texturing the environment. I will go through the basics so that you will get a greater understanding of how to use the 3D application Blender. Once the environment is created, we will then go through the process of creating the actual animation. Here I will show you tips that I use to create the best possible animation with what ever skill level you have. Once we have decided that the animation is as complete, we will go through critiquing and the final polish. We will add sound for the final touch and our short film will come alive.

By the end, we will have a completed short film that can be shown at film festivals.

Who is the target audience?
Those who love animation
Those who have limited time and want to be creative

Watch online or Download for Free

01. Introduction
02. Completed Short Film
03. Super Crash Course Blender
04. Story and Writing
05. Sourcing Characters
06. Location Scouting
07. Modelling – creating road and building1
08. Modelling the Main Building
09. Modelling – finishing building1 and creating new buildings
10. Modelling – expanding the second story
11. Modelling Building Part5
12. Modelling Building Part6
13. Modelling Building Part7
14. Modelling Building Part8
15. Modelling – Extending the street
16. Source Textures and Texturing buildings
17. Texturing Buildings
18. Texturing Buildings Part2
19. Texturing Buildings Part3
20. Letterbox – Modelling
21. Letterbox – Texturing
22. Import Character
23. Walk Cycle Part1
24. Walk Cycle Part2
25. Walking forward
26. Blocking Part1
27. Blocking Part2
28. Blocking Part3
29. Blocking Part4
30. Blocking Part5
31. Camera Setup Part1
32. Camera Setup Part2
33. 2nd Pass Part1
34. 2nd Pass Part2
35. 2nd Pass Part3
36. 2nd Pass Part4
37. 2nd Pass Part5
38. 2nd Pass Part6
39. 2nd Pass Part7
40. 2nd Pass Part8
41. 2nd Pass Part9
42. 2nd Pass Part10
43. 2nd Pass Part11
44. 2nd Pass Part12
45. Face Pass Part1
46. Face Pass Part2
47. Face Pass Part3
48. Face Pass Part4
49. Upgrading the letterbox Modelling
50. Piano Timing Part1
51. Piano Timing Part2
52. Alternate Walk cycle and import character
53. Moving forward with Alternate Walk cycle
54. Self Critique Part1
55. Self Critique Part2
56. Rigging a Car
57. Fixing Self Critique Part1
58. Fixing Self Critique Part2
59. Modelling – rework the background
60. Fixing Critique
61. Rework on the Letterbox, Modelling and Texturing
62. Creating Roof Tiles and Doing Some Retexturing Part1
63. Creating Roof Tiles and Doing Some Retexturing Part2
64. Creating Roof Tiles and Doing Some Retexturing Part3
65. Apply Roof to Other Buildings and More Retexture
66. Recap of What Needs to be Worked on
67. Reworking the Road Part1
68. Reworking the Road Part2
69. Painting the Car and Reworking the Sign
70. Changing the Camera Settings – Focal Length
71. Final Composition and Timing
72. Powershell
73. Creating the Video
74. Creating the Sound Track Part1
75. Creating the Sound Track Part2
76. Creating Credits
WetPaintSource.7z


Join us on
  Channel    and      Group

  • Facebook
  • Twitter
  • Google+
  • Linkedin
  • Pinterest

2 Comments

  1. Hi
    I hope that you can help me with this masterclass
    please can you upload this one?
    Philip Bloom’s masterclass
    https://www.mzed.com/courses/philip-bloom-cinematic-masterclass

    • this one we don’t have. Maybe this is what you need?
      The Illumination Experience – Cinematic Lighting Training & Masterclass

Leave a Comment

Your email address will not be published. Required fields are marked *