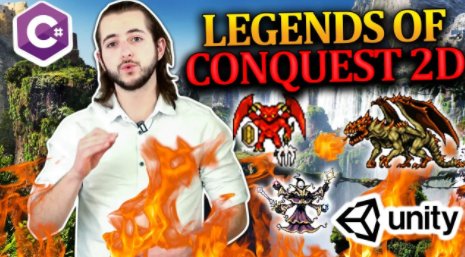
The Complete Guide to C# and Unity 2D Programming – Build an RPG
Release date:2022
Author:Michael Murr
Skill level:Beginner
Language:English
Exercise files:Yes
What Will I Learn?
Master the art of problem solving when it comes to game development. By understanding what obstacles you may face and the many ways to find solutions
Learn the fundamentals of C#. Everything from variables, “if” statements and creating an object oriented structure. No prior programming experience necessary.
Become a professional programmer by learning “Version Control” a tool used by expert engineers. Not only in game development but in all programming projects
Transfer everything you learn from this course into any programming language you choose. Like JAVA, JavaScript, Python, C++ and other object oriented languages
Requirements
A Working Computer or Laptop with minimum requirements to run Unity and Visual Studio (Which aren’t too demanding)
The desire and drive to learn how to create a fun and enjoyable game
Description
This course is made with the latest content and newest technics used in modern Game Development (Unity 2D 2021)
The best way to learn anything is by doing it in a really fun way and this is where this course comes from. If you want to learn how all these incredible games you see are made there is no better place to start than this course. We made sure that this course has everything you need to take you from a beginner (even with zero codding experience) and slowly take you to intermediate level
I chose the main project in this course to be a 2D RPG because it not only has a vast library of game development concepts that we can implement and learn, but also because it’s very simple (especially if you are a beginner) to delve in and get started on your game development journey.
Everything in this course has been meticulously crafted, review and recrafted to provide you with the best experience possible and maximize your learning as much as possible. So not only will you have a great time learning you’ll also get the MOST BANG FOR YOUR BUCK by going away from this course with a lot of tools in your arsenal to continue you journey in the wild west of game development.
Section 1: Introduction
We’ll start off by downloading Unity and Visual studio. Installing them and making sure they work. We will then create our first code in C# and get used to Unity interface. Finally we’ll talk about the game design of our game and what it takes to start creating a game from scratch
Section 2: Setting Up Player
In this section we are going to start learning what sprite sheets are and how to set them up. We’ll learn what sorting layers are in Unity. We’ll look into colliders and RigidBodies and add them to our game objects and see how it starts getting affected by physics. we’ll learn how to animate our sprites. We’ll even understand what blending trees that will greatly help us reduce difficulty of animating
Section 3: Scene Management
In this section we will learn about the scene manager in Unity that will allow us to create multiple levels in our game and transition between them. Plus we’ll learn a very tricky way to making sure we always arrive in the right position when moving through our worlds
Section 4: Tilemaps & Cinemachine
This section is the evolution of the previous one. Where we move from just adding maps as images to painting them using tile sets that you can download and customize yourself. We also learn about Cinemachine which is a very powerful and modern tool in Unity
Section 5: Dialog In Game
What game doesn’t have a dialog system. This is where we add new NPC’s to our game. Create UI learn about arrays and add more life to our game by introducing a way to interact with the world around us that we created in the previous section
Section 6: Player Stats
Again what game, especially a RPG doesn’t have stats for every character? WE have strength, Mana, health etc.. and we introduce a leveling system and XP. We learn about loops in C# which is a very powerful tool in and programming language and will really build your foundations
Section 7: Menu System
This section is full of artistic creating which means you have the full liberty of creating your own. This is were we don’t create anything NEW but we put all the information that we’ve taking into account so far in front of our player and making sure he can access that info easily
Section 8: Inventory System
This is also a section that could have been called ADVANCED C# because we take our coding to the next level. We learn about Lists another powerful tool in C#. We learn how to pick up items. Add them to our inventory using the advanced C# tools and make sure that all of this works smoothly especially when we also discard those items. Finally we use those items on our characters
Section 9: Shop & Money Systems
Now that we pick up items, we want to sell them… for MONEY! who doesn’t like money? we will introduce a monetary system so basically create an economy. We create a shop with a shop keeper inside and we’ll be able to transact with him using the money we have to buy and the items we have to sell
Section 10: Questing System
This is my favorite part of the game. Because we start adding quests. And this turns our game from a normal game to and RPG. We can get quests, complete them, get rewarded with items. Some objects will only appear on after we complete some kind of quest. This one is really fun
Section 11: Save & Load
It’s imperative that we do not lose our progress in an RPG that’s why we introduce a Save and Load system. We will keep track of our player position and the world he was in. We will keep track of the items we have in a very sophisticated way. And every else also that needs to be saved and loaded
Section 12: Music & SFX
Time to breath some life into this game adding sound effects and Music. Now our game goes from static to dynamic. We will add background Music and SFX. To each level and each interaction respectively
Section 13: Main Menu
Every game HAS to have a main menu. But it also needs a dynamic main menu. We create a simple menu with a background. But the exiting part of this is the way we give the ability to our player to either continue from his last save or start a new game
Section 14: Setting Up Battle System
Until this point we’ve had a pretty decent game I would say. But now it’s time for the real deal. We are no longer walking around and talking to NPC’s it’s time for WAR. We are creating a battle system. This is the first step of one the biggest scripts that you and I will ever create. So strap your thinking caps on and hold down to your seats this is going to be a bumpy ride
Section 15: Enemy Attack System
Now that we’ve started a battle with enemies. Time to give them the ability to attack us. We will choose which enemy is attacking. How much damage he’s giving and we’ll even display it on screen and see what happens when our players don’t have any health left
Section 16: Player Attack System
Now it’s our players turn to defend themselves. We will give the ability to fight back. And also the ability to run away from the battle. We’ll use various attacks such as normal slashing, using different types of magic and on top of that using items during battle
Section 17: Battle System Ending
This is where our journey ends unfortunately my fellow game developers. We handle the dead players. We handle the dead battlers. We create a victory screen. A game over screen. We give our rewards. And we end this section and this course with a BANG!! by creating a BOSS fight
What You Will Learn In This Course:
- Use Visual Studio with Unity in a simple way
- How to set a good Game Development environment
- Unity Engine are in a simple and comprehensive way
- The Basics of C# in the most fun ways possible by creating a game
- Use player input to control the behavior of our game
- Add different component to game objects
- Add gravity and other forces to game objects
- Make game objects interact with each other in our game
- Add sprite sheets and slice them up
- Create Tile assets
- How to create levels from our tile assets
- Become a ninja problem solver and learn how to go step by step to solve any problem in Game Development and coding
- Create animations
Who is the target audience?
Aspiring Game Developers that don’t know where to start when it comes to creating games
Young programmers who want to learn the basics of coding in a really fun way by creating their own games using Unity’s very simple engine
Someone who’s looking to create a 2D Role Playing Game and doesn’t know how to do it easily and efficiently


 Channel


Hello part 16 & 17 is the same file, both of them is part 16, the missing one is part 17, can you update it? Many Thanks
Hello part 16 & 17 in the link is the same file, both of them is part 16, so the missing part is 17, can you update it? Many Thanks
Hello part 16 & 17 in the link is the same file, both of them is part 16, so the missing part is 17, can you update it? Many Thanks
Hello part 17,73,75,78 is missing, I already view it that link part 17 is the same as 16, part 74 is the same as 73, part 76 is the same as 75, part 91 is the same as 90. Can you review and update it? Many Thanks
Missing parts 17 32 74 76 79 91
Please add it!
Video number 17 isn’t working properly and just brings up video number 16