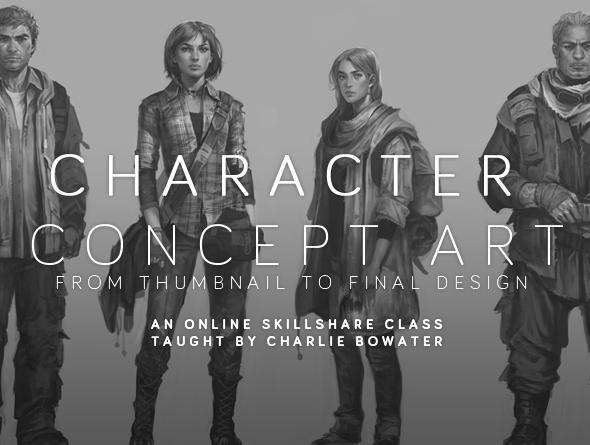
Charlie Bowater – Character Concept Art – From Initial Sketch to Final Design
Release date:2019
Duration:00 h 51 m
Author:Charlie Bowater
Skill level:Beginner
Language:English
Exercise files:Yes
Capture the essence of a character through concept art. I’ll be taking you through the various steps of character creation, from the initial silhouettes through to a final polished design. I will focus on a particular genre of character but feel free to create any character you wish, as the methods can still be applied.
This class is perfect for anyone with a passion for art, from beginners to professionals looking to learn a different approach. This class will take you through the various steps of character concept art, showcasing your range of ability (a perfect portfolio piece for anyone interested in Concept Art!).
What You’ll Learn
Sketch. The first stage of the class is to start sketching out rough thumbnails that focus purely on the shape and silhouette of your character. During this stage I will explain the importance of brush choices / strokes and speed.
Refine. I the next stage of the class we’ll begin the process of refining the character. You’ll have some pretty rough images from the thumbnail stage and will start cleaning them up and evaluating the design, shape, pose and structure of your thumbnails.
Variation. Standard with almost any character design, for clients in particular, next comes the stage of variation. Rarely will a client want to see a finished design instantaneously, We’ll go through the process of picking a refined thumbnail as your starting point and varying the design to create alternatives.
Final Design. In the final stage you’ll have chosen your final character design and it’s time to add in some detail and really make the character shine.
What You’ll Do
You will create a final concept art piece, designing a character of your choice. This will be executed from start to finish, covering all essential techniques and ideas in concept art.
Class Outline
Preparation. You’ll begin this art tutorial by going over the hardware and software character designer Charlie Bowater uses to create client work. Charlie will help you choose your canvas size and which brushes to use. She’ll also give you a tour of her own brush collection, which she established by picking and choosing brushes created by other artists.
Create your thumbnails. You’ll create a character theme to help keep you on track as you design a series of thumbnails. Charlie will show you some of her characters for inspiration before diving into Photoshop, where you’ll watch her sketch a number of rough character silhouettes modeled after the theme of a fantasy-based traveler. At this point in the design process, you’ll learn to avoid getting too detail-oriented, because it will distract from your overall concept. Charlie will teach you some tricks to help you stay away from details and discover “happy accidents” in the early stages of your work.
Refining. The goal of the refining step is to make sense of your rough thumbnail sketches. First, you’ll learn to understand the poses you’ve created and break them down by superimposing stick figure drawings over your thumbnails. Then, you’ll start playing with negative space and adding more detail to your sketches. Remember to use a few of your thumbnails to give you more to choose from later. After all, when it comes to game designing, you’re never going to present a client with just one character design.
Variation. You’ll choose a few thumbnails from the previous step before honing in on one, which you’ll then copy so you can work with three or four versions of the same character design. From there, you’ll be able to experiment with different poses, outfits, hairstyles, and accessories. Charlie will remind you to think about the character’s setting and personality as you do this so that you don’t stray too far from the original concept — an important path to follow in any game design course.
Adding the finishing details. You’ll witness Charlie’s complete process as she polishes her character, adding textures to achieve a grittier look in some places and blending for a softer appearance in others. Charlie will demonstrate her own technique for blending and how she adds contrast to her character, still in greyscale, by establishing a mid-tone and adding shadows and highlights accordingly.
Finishing details: part 2. You’ll see how Charlie creates complex, rich textures like hair, fur, crystals, and even an engraved belt buckle, and she’ll show you how she cleans up all the background mess in her character drawing. In this final stage, you’ll also take a deeper dive into the process of painting convincing highlights and shadows, ultimately creating a character so three-dimensional it could jump right out of your computer screen. Looks like it’s time to move onto a motion graphics tutorial to really get your character moving.



 Channel


the link are dead 🙁
thanks, will reupload soon
I’ve reuploaded the course files, hope it works out
Links don’t work 🙂
thanks for your comment. Files have been reuploaded, please wait a couple of days these to be transcoded.
ok thanks 🙂 !
her videos were deleted
due to copyright complain… We’ll fix it soon. Thanks
you’re the best, Strawberry
please the links are dead
we work on it. Source files are corrupted. Please be patient.
The videos are not playing
It is fixed already. Thanks
First Five Videos are Removed. Plz Reupload
The whole course has been reuploaded and fixed.
Enjoy, share and support!