


The Shining – Learn Blender for Production

Release date:2016, November
Duration:09 h 12 m
Author:Vertex Twin
Skill level:Beginner
Language:English
Exercise files:Yes
What Will I Learn?
Use what you’ve learned to create your own production-quality shots, whether it’s for film, television or personal projects.
Requirements
You will need to have a very basic understanding of Blender. In other words, how to download it and install it. You should also know how to select objects and move around in the viewport. I show the rest, so you won’t have to worry about that!
Description
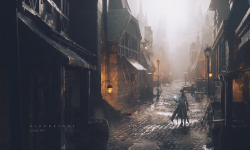
In 1980, Stanley Kubrick released The Shining in theaters, a horror film based on Stephen King’s novel of the same name. Today, you’ll learn how to recreate the iconic elevator scene using Blender, the free and open-source 3D program. With Blender, you’ll learn how to model and texture the scene, including adding a fluid system and a dynamic paint system to make the scene come alive. In the end, we’ll use Blender’s Video Sequence Editor to color correct the render, add slow motion and render to a final video.
Who is the target audience?
This course is for Blender users who have basic to intermediate knowledge and want to expand their skills.
01. Introduction
01. Introduction to the Course
02. My Blender Setup
02. Let’s Start Modeling
01. 1. Modeling the Walls
02. 2. Setting Up the Camera
03. 3. Modeling the Elevator Area
04. 4. Creating the Moulding
05. 5. Picture Frames and Pot
06. 6. Elevator Floor Sign
07. 7. Elevator Buttons and Wall Rug
08. 8. Modeling the Table
09. 9. Modeling the Radiator
10. 10. Modeling the Chair
11. 11. Cleanup and Adjustments
03. Time for Texturing
01. 1. Quick Note
02. 2. Render Note
03. 3. Light Setup
04. 4. Floor Marble
05. 5. Moulding Wood Texture
06. 6. Elevator Sign Metal
07. 7. Table Wood
08. 8. Rug Texture
09. 9. Red Doors
10. 10. Pot Texture
11. 11. Pictures
12. 12. Radiator Material
13. 13. Chair Texture Part 1
14. 14. Chair Texture Part 2
15. 15. Chair Texture Part 3
16. 16. Back Wall Part 1
17. 17. Back Wall Part 2
18. 18. Back Wall Part 3
19. 19. Back Wall Part 4
20. 20. Texturing Adjustments
04. Creating the Fluid System
01. 1. Quick Introduction to Fluids
02. 2. Fluid Setup
03. 3. Wall Obstacle
04. 4. More Obstacles
05. 5. Fluid Settings
06. 6. Making a Preview Animation
07. 7. Adding a Second Inflow
08. 8. Animating the Obstacles
09. 9. Final Fluid Result
10. 10. Creating the Blood Material
05. Setting Up the Dynamic Paint
01. 1. Quick Introduction to Dynamic Paint
02. 2. Making the Floor Paint
03. 3. Creating the Floor Paint Material
04. 4. Making the Pot Paint
05. 5. Fixing the Chair
06. 6. Making the Chair Paint
06. Finalizing Everything
01. 1. Rendering a Still Image
02. 2. Learning How to Add Motion Blur
03. 3. Rendering an Animation
04. 4. Making a Video with the Video Sequence Editor
05. 5. Conclusion


Can you give me a blender dinosaur creation course? I need it please help me.
I can’t find that course
https://www.blendermarket.com/products/dinosaur-creation-tutorial-series This one?
thanks man.
can you please upload this one- “Unreal Engine Cinematic Creator: Lights, Camera, Action”