Revit Interior Design Project Techniques

Release date:2018, August 31
Duration:03 h 11 m
Author:Chante' Bright
Skill level:Intermediate
Language:English
Exercise files:Yes
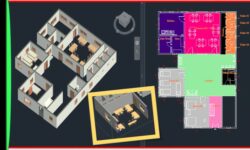
Autodesk Revit is widely known for its architectural drafting capabilities, but its features also lend themselves well to interior design projects. If you’re looking to tackle a project in Autodesk Revit, but don’t know where to begin, then this course is for you. Join instructor Chante’ Bright as she shares techniques and tools that can help you leverage Revit to create striking presentations and effective documentation. Chante’ steps through how to set up your workspace, add custom materials, create preliminary designs, use lighting effects in interior spaces, and more.
Topics include:
Managing your information
Working with the camera
Getting organized
Adding custom materials
Creating project schemes
Understanding design options
Placing components
Adding materials
Placing a ceiling for lighting
Proper lighting techniques
Rendering a view in the cloud
000.Create stunning presentations for interior design
001.Taking care of business
002.Head over feet
003.Creating the interior elevation
004.Set it and forget it
005.Laying out and setting up
006.Seeing things clearly
007.Working with the camera
008.Putting things in their place
009.Getting organized
010.Adding custom materials Part 1
011.Adding custom materials Part 2
012.Texturizing
013.Classifications
014.Understanding design options
015.Using phasing and options together
016.Connecting the dots
017.Adding casework and other equipment Part 1
018.Adding casework and other equipment Part 2
019.Understanding component visibility
020.Placing kitchen components
021.Creating extrusions
022.Creating revolves
023.Adding materials
024.Finishing touches
025.Digital staging
026.Adding materials by component
027.Adding materials by paint
028.Placing a ceiling for lighting
029.Proper lighting techniques Part 1
030.Adding a studio light
031.Rendering a view in place
032.Rendering a view in the cloud
033.Next steps
Ex_Files_Revit_Interior_Design_Project_Techniques.7z