


Non-Destructive Hard Surface Modeling in Blender

Release date:2020, April 13
Duration:05 h 12 m
Author:Josh Gambrell
Skill level:Beginner
Language:English
Exercise files:Yes
What Will I Learn?
Hard Surface Modeling
Non-Destructive Modeling
3D Modeling
Texturing, Materials, Compositing and Rendering
Boolean and Bevel Workflows
Blender 3D
Issues with subdivision surface modeling
Requirements
Basic computer knowledge
Basic Blender tools and keys
Description
Hey there! Josh here, presenting you with my newest and most beneficial course: Non-Destructive Hard Surface Modeling in Blender. We’ll cover the following:
Non-destructive workflow and modeling theory
Boolean and Bevel operations
Problems with Subdivision Surface workflows
Comprehensive modeling, texturing, and rendering workflow
Issues with booleans and how to solve them
Proper lighting and rendering settings for photorealism
Overview
We’ll start with some important introductory info. You’ll understand how booleans and bevels work powerfully together, along with why the subdivision surface workflow is overused and will give us problems in the future.
Next, we’ll hop right into the meat of the course: the modeling. We’ll block out the model first, ensuring accurate dimensions to help us achieve a flawless workflow. Then we’ll use boolean cutters and various hard-surface modeling techniques to add accurate detail. The core of the course will involve mastering the boolean and bevel modifiers, while also solving the annoying issues caused by these modifiers.
After modeling, we’ll use Blender’s built-in material system to achieve realistic textures and real-world material settings.
Next, we’ll add text decals to the model to give it a feeling of completeness and realism.
Finally, we’ll set up the scene for rendering, giving it a nice background and stunning camera settings to achieve a photorealistic render.
You won’t be able to tell whether your final scene is a 3D render or photograph; it looks that real.
You’ll also be protected by Udemy’s 30-day money back guarantee. There’s no risk in enrolling!
Master the Non-Destructive Workflow
Have you ever heard of the term “destructive” or “non-destructive” while 3D modeling? Well, what’s the difference, and is one better than the other? The answer is it depends. This course will focus mainly on the non-destructive workflow, but we’ll also use destructive modeling techniques throughout parts of the course. This means that you’ll gain an intuition for when to use one workflow over the other. You can use both workflows together when one technique is better suited over the other.
The power behind the non-destructive workflow is that we can use booleans with ease. Booleans are those things that allow you to add cut-outs to your model, kind of like when you cut out shapes in cookie dough before baking them. However, if you’re familiar with 3D, it’s no surprise that booleans can cause significant issues. We’ll discuss how the bevel modifier can solve most of these problems.
How is this course different?
I see the term “non-destructive” thrown around too much without detailed explanation. It took me forever to finally understand and gain an intuition behind this workflow. What techniques warrant the term “non-destructive”? Why does this workflow even matter? The answer is to just stop worrying about it; people get too caught up focusing on one workflow or another, where they should just be designing and naturally using such techniques without even realizing it. What does matter is how well you’re applying your skill set. This course will give you the intuition behind 3D modeling, meaning you’ll just be able to create without thinking too much about which workflow to use.
Remember when you first learned how to drive a car? You had to think about how hard to press the gas pedal, how much to turn the wheel, how to angle your car to park nicely, or how to time a merge into traffic. But over time, these techniques became muscle memory and you didn’t have to think about it. By the end of the course, 3D modeling will feel much the same way, and you’ll be able to just work rather than worry.
Conclusion
Whether you’re a beginner or experienced 3D artist, this course will help expedite your workflow and give you new techniques to use. Blender is a massive 3D software, with so many different areas to focus on. The course breaks everything down nicely for the beginner viewer, while not being overwhelmingly boring for the experienced one. With the key strokes listed and every operation detailed, you won’t fall behind or get lost during the design. This course is meant to revolutionize your 3D ability, and will leave you a proficient modeler by the end of it.
Who is the target audience?
Beginner modelers wanting to learn new and efficient workflows
Experienced 3D users wanting to get familiar with non-destructive workflows
Students wanting to learn hard-surface modeling/design
Students who want to master their 3D modeling skill set
Section 0 – undefined
01 – Promo Video
Section 1 – Introduction to Non-Destructive Modeling
02 – Overview of Beveling
03 – The Bevel-Boolean Workflow
04 – Issues with the Subdivision Surface Modifier with Non-Destructive Modeling
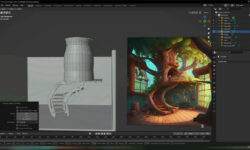
05 – Overview of the Final Model
Section 2 – Modeling
06 – Setting up the Scene
07 – Creating the Volume Slider
08 – Creating the Slider Knob
09 – Creating the Spindle
10 – Creating the Power Switch
11 – Creating the Start and Speed Buttons
12 – Creating the Adapter
13 – Creating Additional Details
14 – Slice Operation
15 – Creating the Control Mechanism
16 – Support Objects
17 – Creating the Arm Holder
18 – Modeling the Cuing Lever
19 – Modeling the Support Mechanism
20 – Creating the Tone Arm
21 – Modeling the Tone Arm Head
22 – Modeling the Tracking Gauge
23 – Finishing up the Turntable
Project Files.7z
Section 3 – Texturing and Materials
24 – Texturing the Turntable
25 – Texturing the Turntable (Part 2)
26 – Texturing the Platter
27 – Creating and Adding Decals
28 – Adding Logos and Numerical Decals
29 – Creating the Power Decal
30 – Creating Additional Decals (1)
31 – Wrapping Text around a Cylinder
32 – Creating the Slider Measurement Decal
33 – Additional Decal (2)
34 – Creating a Circular Decal
35 – Adding LED Lights
36 – Finishing Touches
37 – Rendering the Turntable
38 – (Bonus) Detailed Rendering using Depth of Field
Project Files.7z


Hi ! Strawberry
can you upload this course : Drawing Robots and Machinery.
from https://courses.svslearn.com/courses/drawing-robots-and-machinery.
This course reveal the secret of the unique style of Jake Parker in drawing robots and mechs.
see you next time,
You are doing a great work!
🙂
this is a great course to have. i am interested in this course too. please upload!!!
Hola Strawberry!
Appreciate the effort put into the website!
Can you please upload these 2 courses from Gumroad:
Moho Character Design Course Troy Picou
&
3D Look inside Moho by Troy Picou
Really need them!
Very few Moho courses are out there.
https://gumroad.com/troypicou
thanks for uploading.Can u upload paintable course ?
Hi) In the future)
Hi, can you upload again this course ? the links dont work. Thanks a lot in advance.
Tsup, all working great)
Thanks for course!
Videos are down 🙁 would you be so kind and reupload them in spare time?
Have a nice day!
Hi brother, can you upload these ones?
Gumroad link: https://uhstudio.gumroad.com/?sort=page_layout
Hello Strawberry,
Can you reupload this course from the 17th video to the last video? the 1st video to the 16th video work fine but others don’t work.
Thank you!