Ad Clicks : Ad Views : Ad Clicks : Ad Views : Ad Clicks : Ad Views : Ad Clicks : Ad Views :
Oh Snap!

It looks like you're using an adblocker. Adblockers make us sad. We use ads to keep our content happy and free. If you like what we are doing please consider supporting us by whitelisting our website. You can report badly-behaved ads by clicking/tapping the nearby 'Advertisement' X text.

From photo to 3D model. Photogrammetry tutorial series

/

Release date:2017, October

Duration:04 h 39 m

Author:adrian2608

Skill level:Beginner

Language:English

Exercise files:Yes

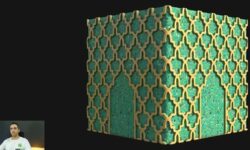
In this series We will use Photoshop Camera RAW for color correcting Our photos and save them as TIFF files, then We will go to Agisoft Photoscan, to generate our model. Masking photographs, aligning, generating dense point cloud data, clean that data, generate mesh, textures. We will also merge chunks, because this object need to be done from two scans. Main part of the trunk, and bottom part which was covered, because it need to stand this way.

Then We will go to Zbrush, for fixing scan errors. Decimating our scan to get usable mesh, and bake displacement maps for later use in Blender/Cycles and it’s new Principled Shader. Before rendering We will also use Substance Designer and Painter to make PBR textures and off course Photoshop for some cloning and relighting.

Table of Contents

1. Project Overview
2. Theory and shooting
3. Color correcting and saving images in Photoshop Camera RAW
4. Loading photos into Agisoft Photoscan.
5. Masking unwanted areas on photos.
6. Aligning photos – sparse point cloud data
7. Clean sparse point cloud data
8. Generating dense point cloud data
9. Clean dense point cloud data
10. Generating mesh
11. Generating texture
12. Aligning and merging chunks
13. Cleaning scan data in Zbrush
14. Decimating mesh
15. Making proper UV data.
16. Re-import to Zbrush and projecting detail to mesh with good UV’s.
17. Baking displacement map
18. Baking all needed maps in Substance Designer for later use in Substance Painter.
19. PBR textures in Substance Painter.
20. Lighting, shading and rendering in Blender Cycles. Using new Principled shader.

  • Facebook
  • Twitter
  • Google+
  • Linkedin
  • Pinterest

Leave a Comment

Your email address will not be published. Required fields are marked *