


Blender 2.79 Character Creation for Games and Animation by Darrin Lile

Release date:2018, October
Duration:15 h 02 m
Author:Darrin Lile
Skill level:Beginner
Language:English
Exercise files:Yes
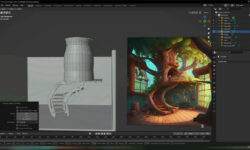
Hi, I’m Darren Lyle a blender foundation certified trainer in this course blender character creation. You will learn how to create a 3-D character for games and animation from the first polygon to the final rigged character.
We’ll begin by creating a base mesh of the character going over how to create the head the body the hands and feet and then from this base mesh, we will create the characters clothes using blender sculpt tools to create creases and folds.
Next, we will use the map the character clothes and accessories and go over how to create a unified U.V. map that can be used to create texture maps external paint programs like Krita.
You’ll learn how to bake a normal map in Blender to capture the high resolution sculpt detail and apply it to a lower poly model.
Finally, we will rig the character and adjust the weights so it forms believably during animation. This Course uses only open-source software blender and Krita to create a character that is ready for character animation and Blendr as well as for import into 3D game engines like unity and unreal. If you’re interested in creating characters for games or animation then join me for this comprehensive course that will take you to step by step through Blendr character creation.
Requirements
You should have a basic understanding of Blender’s interface and modelling tools.
The instructor uses a graphics tablet in the sculpting and texturing sections of the course.
Description
In this course, you will create a 3D character for games and animation, from the first polygon to the final rigged character.
You’ll learn about:
- 3D modelling a character in Blender
- Modelling clothes and accessories in Blender
- Using Blender’s sculpt tools to create creases and folds in clothes
- UV mapping a character in Blender
- Texturing in Krita
- Painting textures for hair, eyebrows, and eyelashes
- Baking a Normal map in Blender
- Rigging the body and face of a character in Blender
We’ll begin by creating a base mesh of the character in Blender, going over how to create the head, the body, the hands and feet. And then from this base mesh, we will create the character’s clothes, using Blender’s sculpt tools to create creases and folds. Next, we will UV map the character in Blender, and go over how to create a unified UV map that can be used to create texture maps in external paint programs, like Krita. You’ll learn how to bake a Normal map in Blender to capture the high resolution sculpt detail and apply it to a lower poly model. Finally, we will rig the character in Blender and adjust the weights so that it deforms believably during an animation.
This course uses only open-source software, Blender and Krita, to create a character that is ready for character animation in Blender, as well as for import into any 3D game engine, like Unity and Unreal.
If you are interested in creating characters in Blender for games or animation, then join me for this comprehensive course that will take you step-by-step through Blender Character Creation.
Who this course is for:
This course is for intermediate Blender users who would like to learn the process of character creation.
01-Introduction
02-Setting Up the Interface
03-Beginning the Face
04-Creating the Loop Mask
05-Pulling the Face Out into 3D
06-Adjusting the Shape of the Face
07-Extruding the Forehead
08-Creating the Top of the Head
09-Modeling the Back of the Head
10-Extruding the Neck
11-Creating the Eye Ball
12-Modeling the Eye Lids
13-Beginning the Inner Mouth
14-Extruding the Ear and Smoothing
15-Adjusting the Face with the SubSurf Modifier
16-Creating the Nostrils
17-Modeling the Gums
18-Beginning the Teeth
19-Finishing the Teeth
20-Reconnecting the Inner Mouth
21-Extruding the Torso
22-Creating the Arms
23-Modeling the Hips and Leg
24-Beginning a Finger
25-Detailing the Finger
26-Creating the Hand
27-Attaching the Thumb
28-Connecting the Hand to the Body
29-Beginning the Foot
30-Finishing the Foot
31-Adjusting the Body
32-Beginning the Jacket
33-Sculpting the Jacket
34-Finishing the Jacket
35-Sculpting the Pants
36-Creating the Shirt
37-Starting the Belt
38-Finishing the Belt
39-Beginning the Boots
40-Continuing the Boots
41-Finishing the Boots
42-Beginning the Holster
43-Continuing the Holster
44-Adding Details to the Holster
45-Finishing the Holster
46-Starting the Gun
47-Modeling the Gun
48-Finishing the Gun
49-Beginning the Hair
50-Working with the Hair Planes
51-Continuing the Hair
52-Finishing the Hair Modeling
53-Preparing for UV Mapping
54-UV Mapping the Head
55-UV Mapping the Clothes
56-UV Mapping the Holster and Belt
57-UV Mapping the Gun
58-Organizing the UV Map
59-UV Mapping the Hair Planes
60-Baking a Normal Map
61-Testing the Normal Map
62-Fixing Artifacts in the Normal Map
63-Texturing the Jacket
64-Texturing the Pants and Boots
65-Texturing the Shirt and Holster
66-Texturing the Head and Hands
67-Baking a Color Map in Blender
68-Adding a Grunge Map
69-Creating a Paint Template
70-Creating the Eye Texture
71-Painting the Hair Texture
72-Applying the Hair Texture in Blender
73-Creating the Brows and Lashes
74-Texturing the Brows and Lashes
75-Using Blenders Texture Paint Tools
76-Texturing the Gun
77-Adding a Transparent Material to the Cornea
78-Preparing the Character for Rigging
79-Placing the Bones of the Body
80-Placing the Eye Bones
81-Placing the Mouth Bones
82-Arranging the Hand Bones
83-Creating the Control Rig
84-Parenting Objects to the Rig
85-Introducing Weight Painting
86-Weight Painting the Torso
87-Removing Weights from the Mouth
88-Adjusting Weights for the Brows and Forehead
89-Testing the Rig
90-How to Undo the Rig


hi, will you also add this one?
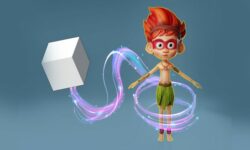
3D ANIMATION: WALK and RUN CYCLE – created by John Aurthur Mercader
https://www.udemy.com/course/3dwalkandrun/
s
w