


After Effects Slideshow Animation#2 – 3D Parallax Made Easily

Release date:2018, October
Duration:01 h 18 m
Author: Maggie Osama
Skill level:Intermediate
Language:English
Exercise files:Yes
What you’ll learn
LEARN the techniques which you could then build on and create your own 3D Parallax Slideshows style using Adobe After Effects .
CREATE 3D Parallax Photo Slideshow Easily using Adobe After Effects .
TURN your simple 2D still images into an amazing moving 3D storytelling slideshow .
GET the After Effects project file and the necessary assets to work along with .
Requirements
A running / trial version of Adobe After Effects ( not older than CS3 )
It’s recommended to be familiar with Adobe After Effects Layout, Keyframing and the five basic transforms
Description
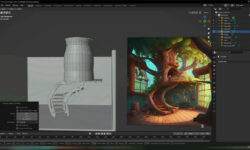
In this course you will learn how to use the extremely powerful Adobe After Effects to create a 3D Parallax slideshow like the one in the promo video.
This wonderful parallax effect will turn your simple 2D still images into an amazing moving 3D storytelling slideshow. We’ve seen this effect in the title sequences and end credits in films, where still photos are animated to have 3D look. A still shot shows up on-screen, and it appears to be moving in 3D space, the camera zooming or tracking forward toward the subject.
I will walk you through the motion graphics process starting from creating a 3D Parallax Photo setup till we reach the final details and finally exporting your project in Adobe After Effects.
Who is the target audience?
This course is for intermediate users of Adobe After Effects
00. Course OverView
01. Create A 3D Parallax Photo Setup
02. A Quick Note About Udemy Review Process
03. Add Masks & Distribute Layers in 3D Space
04. Add Camera & Line Up The Layers Correctly
05. Change Masks Properties Using Numeric Values
06. Add Fast Blur Effect & Create a 3D Camera Animation
07. Add Lens Effect & Camera Wiggle
08. Add As Many Photo Slides As You Want Easily and Quickly
09. Create a Transtition Matte
10. Add Light Leaks
12. Create Watercolor Title
13. Position Watercolor Title in 3D Space
14. Export Your Project
16. Thank You
UdAfterEffectsSlideshowAnimation23DParallaxMadeEasily.zip


where is the video number 11 ?